Updating icons on Cases in Dynamics 365 CRM
Reading time: 4 - 8 minutes
If you use the Customer Services element of Dynamics 365 CRM, the main table you’ll probably be interacting with will be Cases. This is where you log and keep track of your, well, Cases – you could refer to them as tickets, incidents or issues but they’re the same type of data and will probably be stored in the Cases table.
If you’re using a custom table in CRM or even another system for this type of data, it might be an idea to look at Dynamics 365 Customer Services so that you can get all the benefits of this ever-improving piece of functionality.
In the past, Dynamics 365 CRM's layout has been accused of being boring so any sort of exciting visualisation is always going to help with user adoption. A recent change has seen the addition of some icons to the views to help liven things up a bit.
In Cases, what you’ll see in the main views of these hasn’t changed that much over the years but you may have seen that things have altered in the last few weeks as Microsoft are rolling out some visualisation updates here. Instead of the standard grids we’re all used to, we’ve now started seeing colours and icons in there – I’ve also been told there’s another blog post in the pipeline about this so please check that one out when it’s available. Anyway, I’m not going to talk about configuring the colours as anyone who’s done any configuration in Dynamics 365 CRM will see where they specify these, but the icons have been more of a challenge. There wasn’t much help out there and I’ve had to learn most this myself but I think I’ve got there so I wanted to share what I found out.
Updating the icons on Cases
You may have seen that your views on Cases has started to change. Instead of the standard grids we’re all used to, we’ve now started seeing colours and icons in there – I’ve also been told there’s another blog post in the pipeline about this so please check that one out when it’s available. Anyway, I’m not going to talk about configuring the colours as anyone who’s done any config in Dynamics 365 CRM will see where they specify these, but the icons have been more of a challenge. There wasn’t much help out there and I’ve had to learn most this myself but I think I’ve got there so I wanted to share what I found out.
Adding a new icon to an existing option
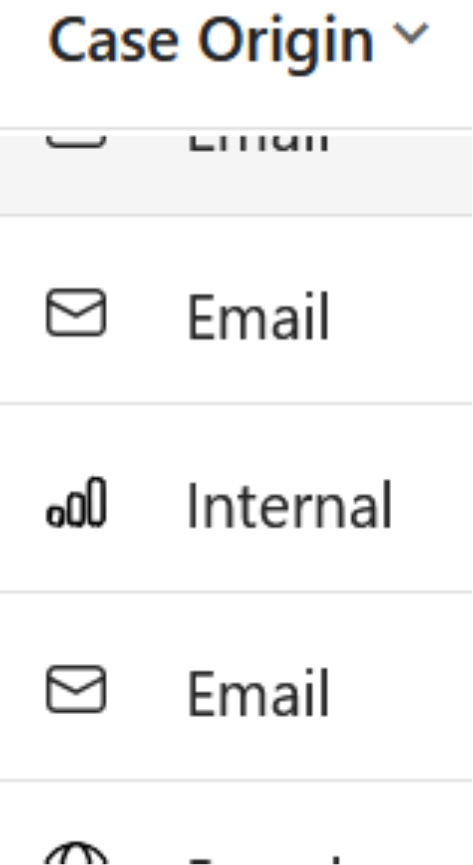
From what I’ve seen, there’s 2 fields on Cases which have icons; Case Origin and Priority. When it comes to Case Origin, a few years ago, we’d just renamed one of the options from Twitter to Internal and this has worked fine since then. However, with the introduction of the icons, we’ve started getting the Twitter symbol which, clearly, it isn’t. This was quite straightforward to fix – I created a new icon using a drawing package, saved it and then used one of the many free online tools to convert it to a SVG file. Once I had my SVG file, it was just a case of updating the appropriate Web Resource. And here’s the first challenge; which Web Resource is it?
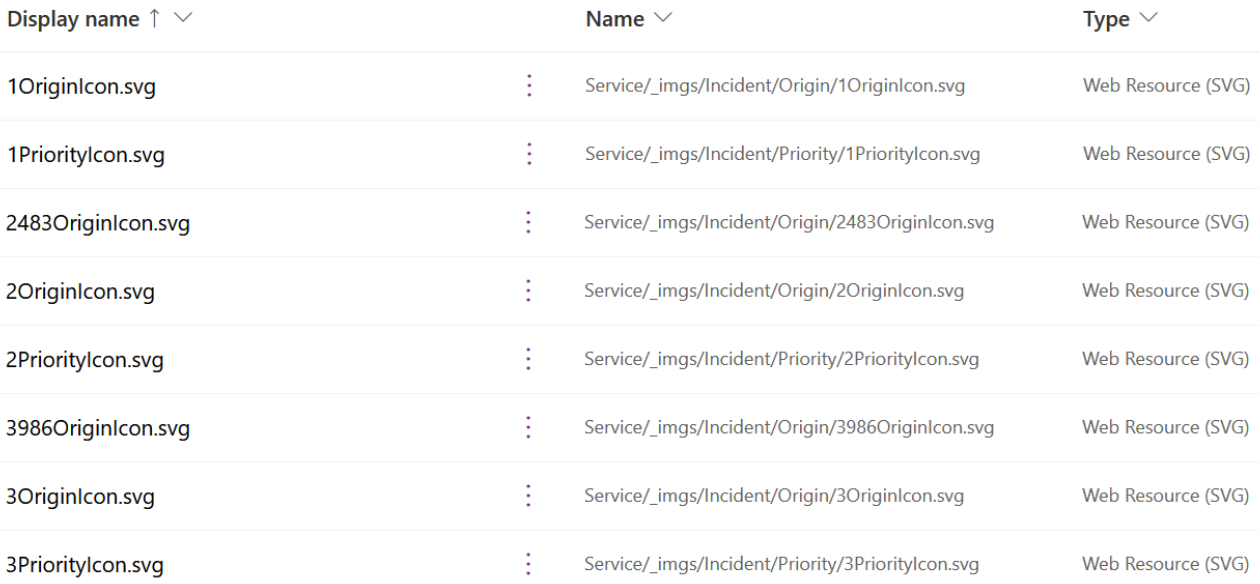
If you go into the default solution and then look at the Web Resources, just search for ‘incident’ and it’ll filter it down to a smallish number:

You can translate the Display Name to find what you’re after. Looking at the ones above, the 5 files whose Display Name is in the format ‘*OriginIcon.svg’ are the ones linked to this field. To find the exact one, the number at the start should correspond to the value in the choice – in Case Origin, the option for Twitter (but now Internal on our system) had a value of 3986 so I found the file ‘3986OriginIcon.svg’.
I clicked on this, uploaded my new image to the Web Resource, saved and published. After a refresh, I went into the Cases view and the Internal option had changed from the Twitter symbol to our company’s logo.

A couple of gotchas to make you aware of. It doesn’t seem to mind what image size it uses – I created one that was 32 x 32 and it seems to work fine but even this seemed a bit big when it was rendered on the view. I wouldn’t go bigger as it’s only going to be shrunk down on the view so any detail you’d add will be lost. The other one is that the rendered image on the view is actually a circle, so if you have anything with details in the corners of the image, they’re going to be cut off.
All I can say is to give this a go and, if it looks a bit odd, upload a new image and see what you think. Eventually you’ll get there.
Adding a new icon to an existing option
On the standard Case Priority field, by default, we have 3 options; High, Normal and Low with values of 1, 2 and 3 respectively. You can see in the image of the Web Resources earlier that these values correspond to the files that are there so ‘1PriorityIcon.svg’ would be for ‘High’ and so on.
However, when we first used this field all those years ago, options 1 and 3 were removed and 3 options were added with values of 200000000, 200000001 and 200000003 for Important, Urgent and Critical. So how do we do this?
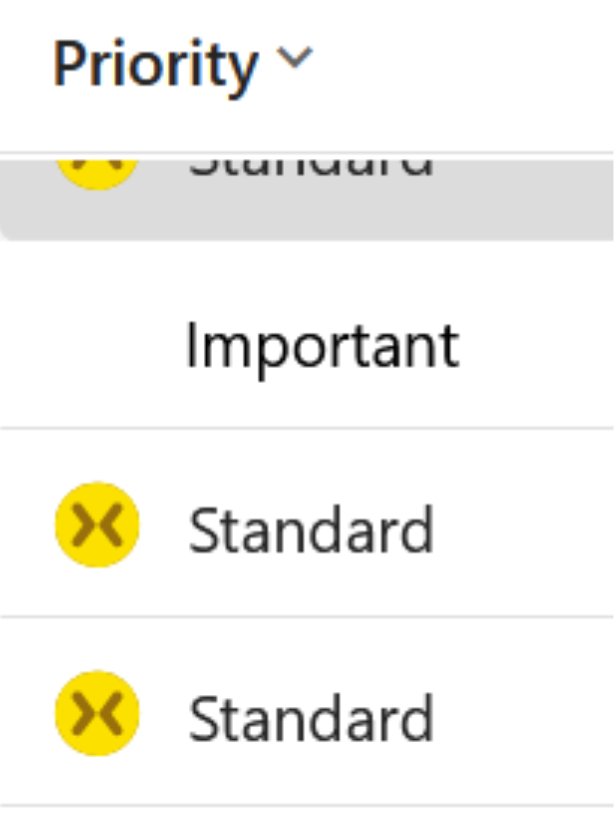
So, we were obviously going to need some new icons so I created these the same way as described before. I had read one article which told me to upload them so the name followed the same schema as the ones that are already there, I wasn’t sure whether that was the Name or Display Name but, as I hadn’t got control over the Name, I went with Display Name so they were uploaded as ‘200000000PriorityIcon.svg’ and so on. Refreshing the Cases view however, I saw blank spaces:

So I guess we’re looking at the Name field – this one's a bit more problematic. Mine were called things like ‘tecman_200000000PriorityIcon’ and there was no way to update this or add anything that would make it the ‘Service/_imgs/Incident/Priority/200000000PriorityIcon.svg’ that it needed to be. To solve this, I put my new files into a solution and exported it.
In the zipped up solution, I could see the WebResources folder with 3 files in – these will be the actual image data. Then there was the usual ‘customisations’, ‘solution’ and ‘[Content_types]’ XML files. Looking in each of these, it was clear that everything I needed was in the ‘customisations’ file. After extracting this and looking down the markup, I found the following:

So I updated this text so it became:

It was only the ‘Name’ tag that I updated, the ‘Display Name’ was correct as were things like the ID, Web Resource Type, etc – it was just that one line that I updated. So I did the same across all 3 of the Web Resources in there, copied the ‘customisations’ file back into the solution (overwriting the file that was already in there) and then imported it back into the Dataverse environment. I crossed my fingers while this happened as I wasn’t sure it would go in and, sure enough, it failed; complaining it couldn’t find the Web Resource I was importing.
At this point, I was out of ideas but then thought that maybe because it was using the same GUIDs for the files, there was some sort of conflict. I changed my environment to another Dataverse one and tried again. Success! My files were in there!

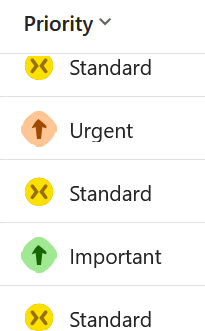
So I went back into the original environment, deleted the 3 Web Resources I’d created and imported the solution back in. This worked. After a quick publish, I went back into the Cases view and refreshed it:

Voila! New icons.
If you'd like to find out more about how to make best use of your Dynamics 365 CRM system, please get in touch.


